Tuesday, 19 February 2013

Make a slip cover for your Midori Traveler's Notebook insert

This one is just for fun. It's a slip cover you can make to store a spare or completed insert booklet.


It's really very easy to make. Begin with a file folder. It can be A4, foolscap, letter or legal size. Open it up flat so the central fold is horizontal, like this:


Next, use a ruler and carefully draw the lines illustrated below.


Cut along the red dotted lines, and score the green ones. Your piece, once cut out, should look like this:


Fold the bottom flap up. Glue the two side flaps and fold them over. It's best to do this while an insert is tucked inside, because this will give it the right, slightly three-dimensional shape.

It will now look like this - sealed on three edges and opening only at the top:


Now you can take a circular punch and make the semi-circular hole at the top edge - front and back - to provide a finger-indent.


The insert will sit fully enclosed by the slip cover except in this indent, where you can grip it with your fingers and pull it out.

Sunday, 17 February 2013

Filofax Pocket monthly diaries for free download


Another request today. This time it is month views in Pocket size. You have a choice of one month per page or one month per view (i.e. across two pages.

Month to view version

You can download this layout as a prepared set or you can download the source files to adapt the design for yourself.


Pre-prepared sets

You can download the 2013 month per page set as a Word file or as a PDF file.

You can download the 2013 month per view (pictured above) set as a Word file or as a PDF file.

Print these double-sided. If you have a duplex printer, set it to flip on the short edge. If you don't then you'll have to print odd-numbered pages and then refeed to print the even-numbered pages on the reverse. You might have to experiment to find out how to refeed the paper.

On one side of each sheet you'll find crop marks. Use a craft knife and a steel ruler to release the Pocket pages and punch them. The templates are set up with mirrored gutters to accommodate the holes.

If using the PDF be sure to set it to print at full size as explained here.


Source files

You can also roll your own using our source files. For month per page, you'll need this Word file and this Excel file.  For month per view size, you'll need this Word file and this Excel file.

If you want to know how to go about using the source files, this post will help you. If you look at the 'Free Diary Pages' link in the navigation bar above, you'll find some videos which explain the mail merge process for different generations of the Office application, too.

Friday, 15 February 2013

An interview with me

I've been featured this week on Femke's "What I wanna know Wednesday" spot on her blog, Deligted. If you want to read what I had to say, you can read it here.

Thursday, 14 February 2013

Midori Traveler's Notebook DIY inserts - finishing touches

I'm a big fan of making my own inserts for the Midori Traveler's Notebook. Recently I offered for download pages you could use to make your own lined or grid inserts.

I've introduced two finishing touches to my own inserts, as you can see in the picture:


Firstly, I've used a white, grain-textured report cover as my insert cover, which gives the insert a rather exclusive and refined look. Secondly, there is the title box. It looks like a rubber stamp, but it isn't. It's printed.

You can download my title page sheet if you like. There are two versions. one for a lined paper insert, the other for a grid paper insert. When you print your lined or grid paper pages, just add one of these title pages to the top of the stack and then stitch to bind in the usual way.


Here are the templates:

  Lined pages title sheet:    Word file     PDF file

  Grid pages title sheet:     Word file     PDF file

Wednesday, 13 February 2013

Filofax minimalist page per day diary - now in Personal and Pocket to download

When Steve and I published the minimalist A5 diary, more than one person asked for Personal or Pocket versions. We are making both available today.

Pocket version - click to enlarge

As in the A5 version, there are no time slots and no visual clutter, just a clear date block and light, ruled lines.

It would be ideal as a diary, but might work well alongside - say - a week to view being used as an appointments diary, where this new layout is used to record notes or to log date-specific information.


You can download this layout as a prepared set or you can download the source files to adapt the design for yourself.


Pre-prepared sets

You can download the 2013 Personal set as a Word file or as a PDF file.

You can download the 2013 Pocket set as a Word file or as a PDF file.

Print these double-sided. If you have a duplex printer, set it to flip on the short edge. If you don't then you'll have to print odd-numbered pages and then refeed to print the even-numbered pages on the reverse. You might have to experiment to find out how to refeed the paper.

On one side of each sheet you'll find crop marks. Use a craft knife and a steel ruler to release the Personal or Pocket pages and punch them. The templates are set up with mirrored gutters to accommodate the holes.

If using the PDF be sure to set it to print at full size as explained here.


Source files

You can also roll your own using our source files. For Personal size, you'll need this Word file and this Excel file.  For Pocket size, you'll need this Word file instead (the same Excel file drives both Personal and Pocket versions.)

If you want to know how to go about using the source files, this post will help you. If you look at the 'Free Diary Pages' link in the navigation bar above, you'll find some videos which explain the mail merge process for different generations of the Office application, too.

Saturday, 9 February 2013

Make a flexible today marker and note holder for your Filofax

It's DIY time again. This is part today marker, part note holder for important messages you want to see every day.


The marker acts as a sleeve for a piece of paper or card which you have cut to size. One usage suggestion is shown below, but you could also use this to carry your reading or shopping list, or if you're abroad a few important phrases in the local language perhaps.


And you don't need to choose just one use, either. Because it is transparent, you can have a different note facing the other way.

The paper note is easy replaceable, thanks to the crafty shaping of the back piece, behind the 'Today' tab:


The piece of card that runs the full height of the marker is used to glue the open cut sides together and to strengthen the edge that will be stressed when you remove it from and replace it on the rings. After punching, use scissors to cut slots from each hole to the edge. This means you can move it easily from week to week without having to open the rings.


So, how is it made? Well, if you've studied the pictures, you should already have a pretty good idea, but I'll run through the steps.

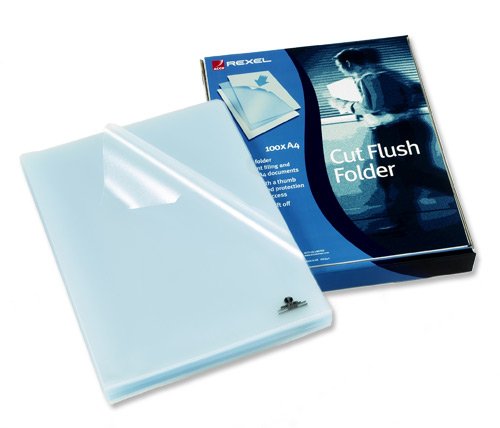
You should start with a clear polypropylene file folder, one of these, for instance:


These are closed on the bottom and left, open at the top and right. Choose one that's fairly thick and robust.

Your starting point is to use a Filofax page as a rough guide to cut out the part you want. It's the bottom, left-hand corner of the folder where the joined sides meet. The piece you cut out should be about 0.5 - 1.5 cm taller than a Filofax page (depending whether you want it to protrude at the bottom as well as at the top.) The width is a matter of personal choice. Mine is about 60% of the width of a Filofax page.

Next you'll need the strip of card for the side. This should be the full height of the piece and 1.5 cm wide. Glue it on both sides and place between the two open long edges. Leave it to dry and trim at the top if necessary.

Next you can punch the holes. Because you're punching plastic, this isn't as straightforward as paper because the plastic will resist the cut and try to stretch instead. Having the card helps, but I've found a single hole punch works better than the 6-hole ones. Use a Filofax page as a guide for where to punch and cut the slots with scissors.

Now you can shape the top tab with a craft knife, before turning the piece over to shape the reverse. This is the hardest bit, because you want to cut through only one layer of plastic, not both of them. I did it by first cutting a few pieces of scrap card to fit together between the layers. Then, I used a craft knife and cut the shape freehand. The blade bit into the card underneath, but didn't penetrate to the plastic behind.

So, how will you use yours?

Tuesday, 5 February 2013

An expenses envelope for the Midori Traveler's Notebook

One of my most popular Filofax inserts was an expenses envelope that was printed on one page and folded to store business receipts. On the front was a form on which you could list expenses. I recently created an envelope to sit in a Midori Traveler's Notebook and realised that if I stuck an expenses form on the front of it, I could use it in the same way I used the Filofax expenses envelope.

So here is the form.


And here is how it looks when stuck to the front of the envelope.


You can download this form as an editable Microsoft Publisher file or as a PDF file. Either way, the file will print 3 forms per page which you can then cut out and use.

LinkWithin2

Related Posts Plugin for WordPress, Blogger...